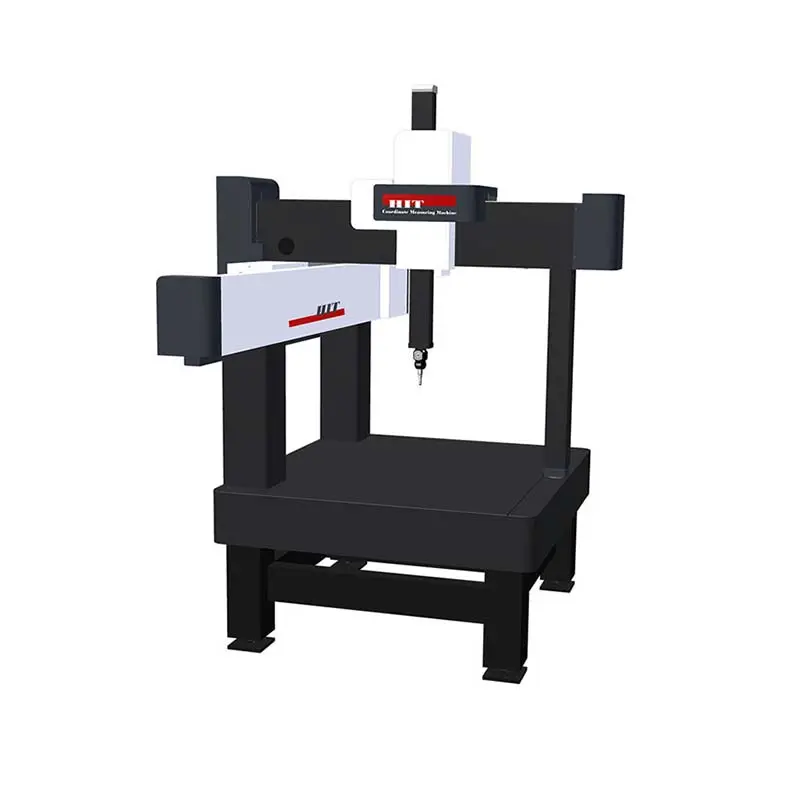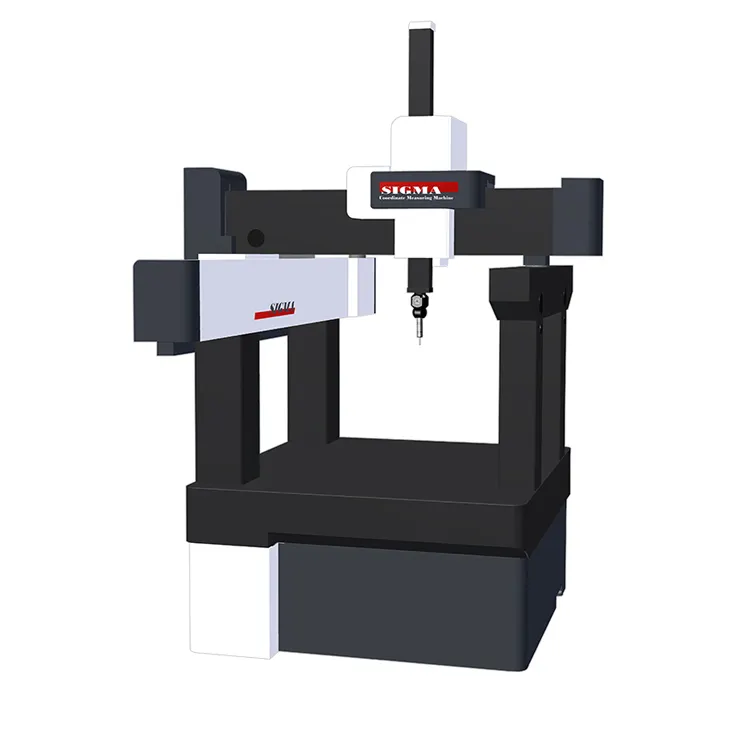
HIT Coordinate Measuring Machine
Brief Introduction
HIT coordinate measuring machine adopts L bridge structure to enhance the position of the Y driving direction and maximize the center of gravity and driving parts of the moving part. All granite structure ensures the overall thermal stability, uniformity and consistency of the equipment. HIT coordinate measuring machine is high precision, self-cleaning air bearings, in different parts of the load, exclusive use of round, square, concave, flat, and other designs, to ensure the smooth operation of the equipment.
Technical Features
- The thermal expansion coefficient of granite is only 1/4 to 1/6 of metallic materials, and has the best temperature sensitivity.
- Mobile part of granite adopts hollow design, wall thickness is strictly calculated and tested, not only improving speed, but also ensuring rigidity.
- Steel wire and gear track transmission are used, outside of the steel wire, there is silicon rubber sleeve, so it can accurately locate and slide.
- The necessary parts are surrounded by air bearings to increase the stability of the equipment.
- It is equipped with shock absorption system, which can resist a certain degree of external vibration.
- Control system adopts modular design, convenient upgrade and fully reserved expansion interface.
- The flight path of the fourth generation algorithm can be set up accurately, such as diagonal speed and radius.
- Control system reserved laser head interface.
- The PLC interface of the automatic production line is reserved for the control system.
- The portable joystick integrates some measuring functions, which is convenient and practical.
Software
( 1 ) Supports automatic and manual measurement of all 17 elements defined in the ANSI/DMIS 5.3 105.3-2016 standard.
( 2 ) Support for least squares, maximum inscribed, minimum external, best area and other computing methods, suitable for various assembly analysis.
( 3 ) Collision detection and path automatic optimization function: software can perform offline simulation to check whether there is a collision in the running process.
If collisions occur, the software can automatically optimize the path.
( 4 ) Output of multiple file formats: NMP, Excel, TXT, DMO, DML and multiple CAD format output.
( 5 ) Support multiple reporting styles, including graphical measurement reports, Excel measurement reports, text formats, etc.
|
Model |
554 |
564 |
655 |
785 |
7106 |
8127 |
|
|
Measuring range(mm) |
X |
500 |
500 |
600 |
700 |
700 |
800 |
|
Y |
500 |
600 |
600 |
800 |
1000 |
1200 |
|
|
Z |
400 |
400 |
500 |
500 |
600 |
700 |
|
|
Dimension(mm) |
L |
1330 |
1330 |
1640 |
1740 |
1740 |
1840 |
|
W |
1230 |
1330 |
1740 |
1940 |
2140 |
2340 |
|
|
H |
2230 |
2230 |
2380 |
2380 |
2580 |
2780 |
|
|
Max error (μm, L:mm) |
2.0+L/300 |
||||||
|
Resolution (μm) |
0.1 |
||||||
|
Air requirement |
4kg/cm²,25NL/min |
5kg/cm²,35NL/min |
|||||
|
Max load(kg) |
400 |
500 |
1000 |
1200 |
1500 |
||
|
Weight |
570 |
630 |
1300 |
1550 |
1800 |
2150 |
|
